







AI-generated videos have a more cohesive sense of continuity thanks to connected scene logic. If the scenes are created independently, characters, products, environments, and camera positions can suddenly change. These discrepancies may break the continuity of the video and make the video look choppy. Seedance 2.5 supports connected sequences via continuous generation, timestamp prompts, reference media, and footage extension. Pippit introduces these features into a structured multi-scene video planning, creation, editing, and export process.
Understand Connected Scene Logic in Seedance 2.5
Connected scene logic is how one visual moment is related to another. For an AI video generator, continuity is crucial, meaning the subjects, actions, settings, camera movements, and key visual elements must remain consistent throughout the video. When a character is walking towards a table, the next moment should be a continuation of that action. The product should also maintain a recognizable product shape, packaging, materials, colors, and proportions throughout the sequence. Good prompts set up the starting point, middle, and end BEFORE the generation begins. This provides a distinct function to each scene and helps the sequence have a logical visual progression.
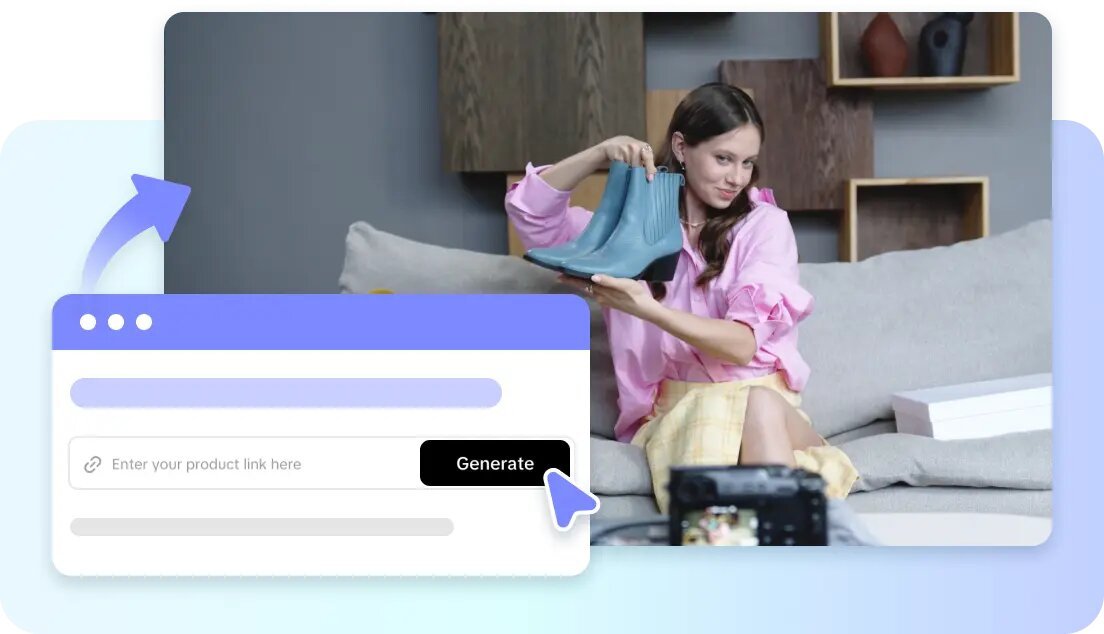
Plan Scene Continuity Before Generating the Video
First, determine the flow from one visual moment to the next for the video. Set the subject, the setting, the activities, the angle of the camera, the lighting, and the visual “style”. For connected video workflows, Seedance 2.5 enables continuous footage, footage extension, timestamp prompts, and reference generation. A product video could start with a close-up, move to a demonstration, and end with a lifestyle shot. Rather than separate clips, organize them as parts of one sequence. When consistency is key, reference images or videos can also be used to help convey the appearance of the product, character details, environments, and styling.
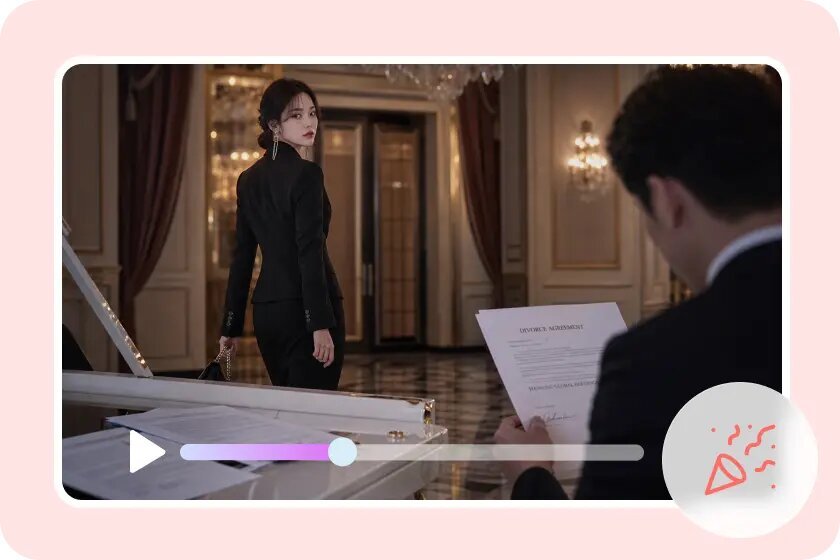
Use Timestamp Prompts to Control Scene Changes
Timestamp prompts break a video down into distinct story beats and indicate when an action, transition, movement, or reveal should happen. Start with the first shot and its intent, then the main action, and then the final reveal or product view. For instance, if you have a product shot that you want to show from 0-5 seconds, have some interaction from 5-12 seconds, and then a wider lifestyle shot from 12-20 seconds. Follow instructions in the order in which they will occur and relate subject movement to camera movement. This allows each moment to flow into the next easily.
Techniques for Creating Natural Scene Transitions
Several techniques can strengthen continuity when creating connected AI video scenes:
- Match subject movement: Continue an existing action instead of suddenly changing the subject’s position.
- Maintain camera direction: Keep pans, tracking shots, zooms, and other movements logically connected.
- Preserve environmental details: Maintain important backgrounds, lighting, objects, and surroundings.
- Sequence actions clearly: Describe events in the order they should happen.
- Use consistent references: Add relevant images or videos when a person, product, environment, or visual style must remain recognizable.
- Extend successful footage: Continue a strong scene when the next moment naturally follows from the existing action.
These techniques reduce abrupt changes and help separate moments feel like parts of one visual narrative.
Steps to Produce Smooth Transitions with Seedance 2.5 Connected Scene Logic
Step 1: Build connected scenes
1. Sign up for Pippit through Google, TikTok, or Facebook.
2. Open the “More” tab on the left and select “Video generator”.
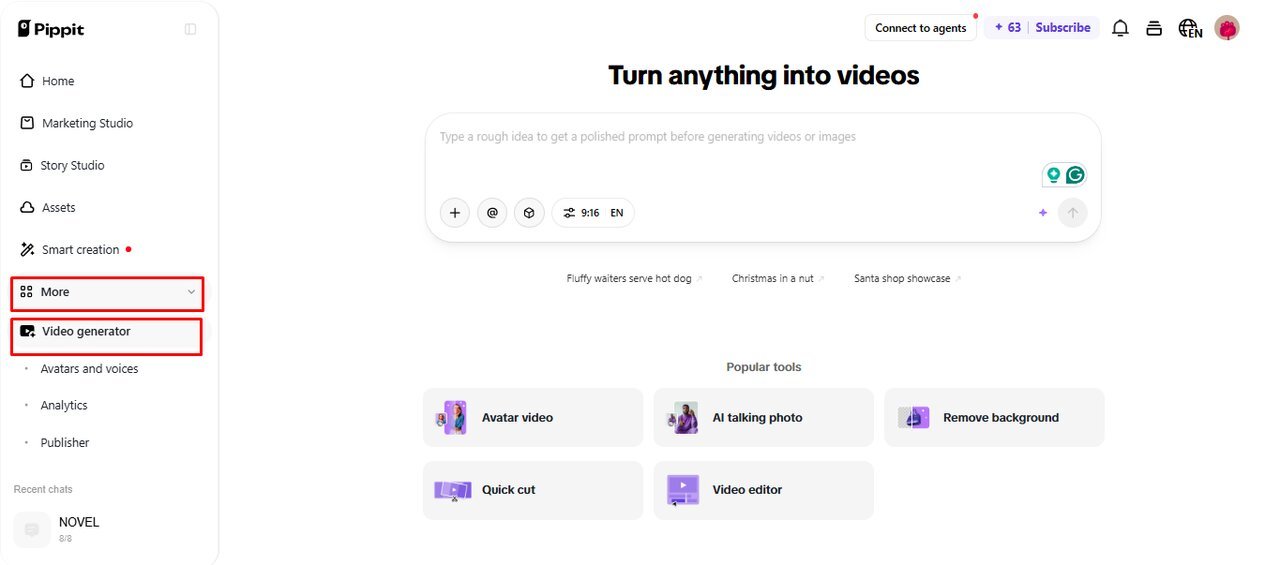
3. Select an AI model, such as “Dreamina Seedance 2.5”, for your video.
4. Enter a detailed prompt describing each scene and explaining how it connects to the next.
5. Choose the video length, language, subtitles, and aspect ratio based on your requirements.
6. Click “+” to upload reference images or videos from your device, phone, Dropbox, or a link. You can also use available assets.
7. Click “Generate” once your prompt and references are ready.
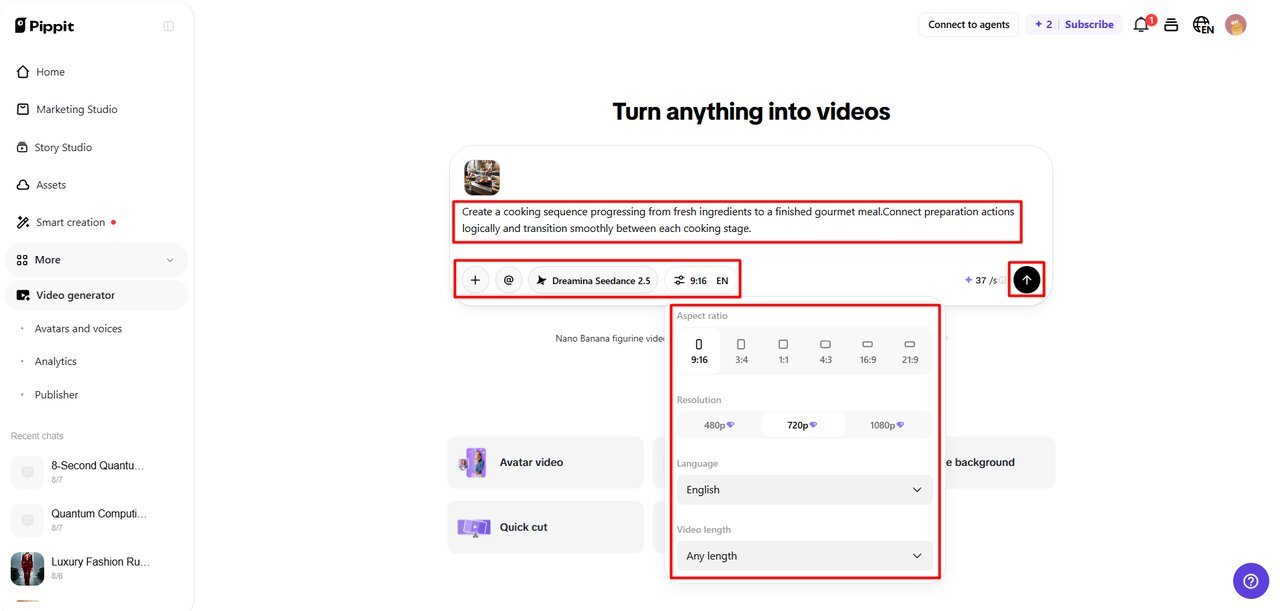
Step 2: Generate a continuous sequence
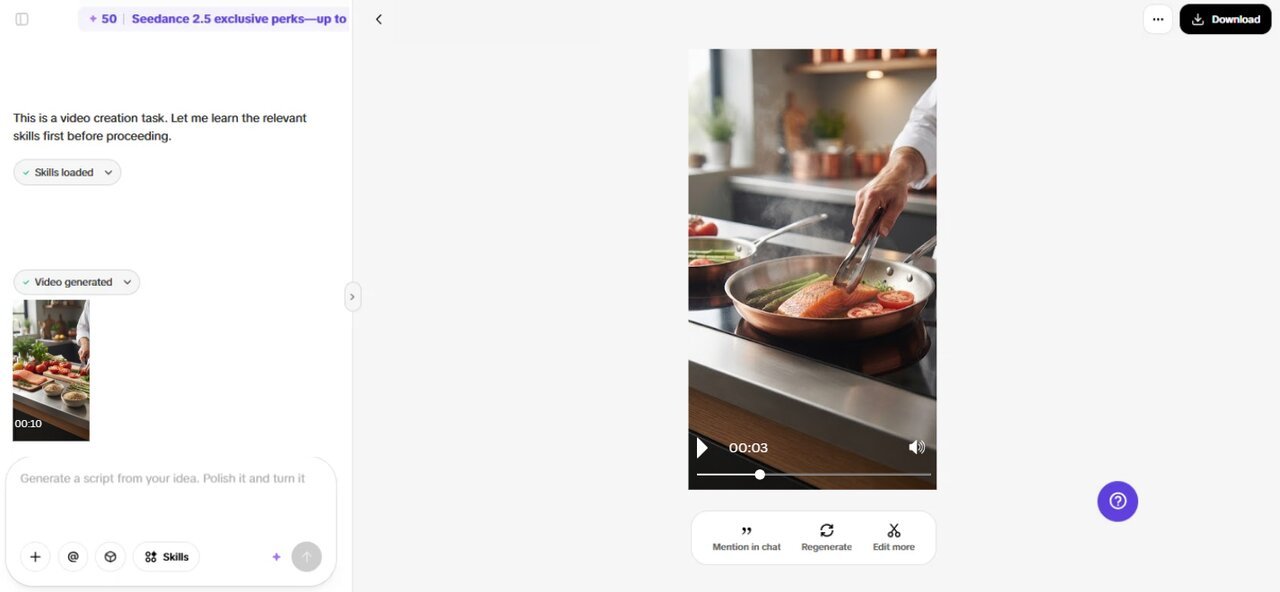
- After clicking “Generate”, Pippit’s AI video generator creates a video using your prompt and reference media.
- The AI handles transitions, pacing, captions, avatars, voice, lyrics, and visual enhancements.
- Review the draft to check whether characters, objects, camera movements, and environments transition naturally.
Step 3: Refine and export the sequence
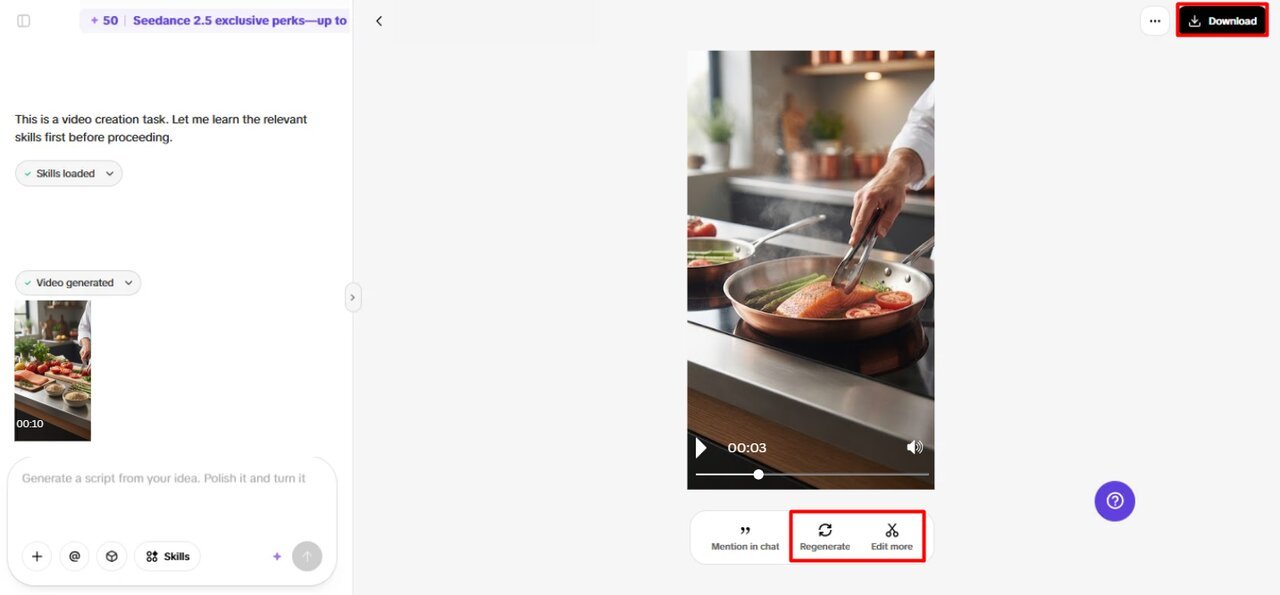
1. Click “Download” in the top right to save the draft. Select “Regenerate” for another version or “Edit more” below the video for additional customization.
2. Edit captions manually, add text, and adjust size, color, alignment, filters, and effects.
3. Add background music, remove backgrounds, and fine-tune visual elements to improve transition quality.
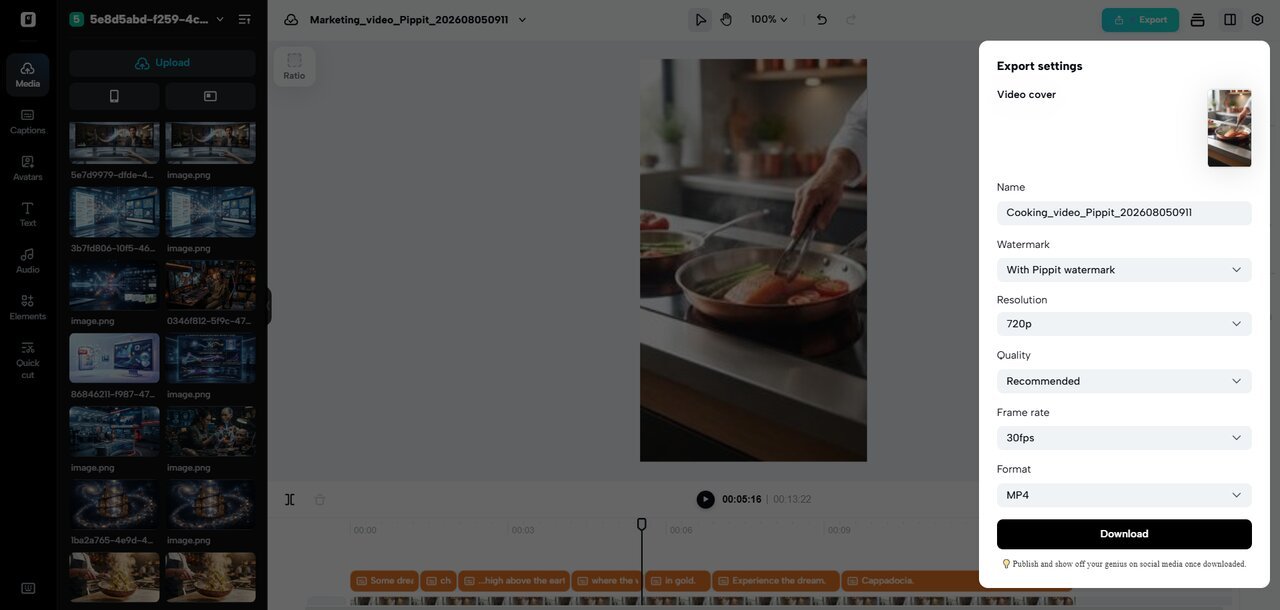
4. Click “Export” when the video is ready.
5. Select “Publish” for TikTok, Instagram, or Facebook, or choose “Download” to save the video with your preferred format, resolution, frame rate, and quality.
Build Longer Narratives and Fix Continuity Problems
For longer projects, several scenes must be used in tandem to create a whole story. Pippit’s Story Studio is used to plan characters, locations, scene order, and progression of a story. Set up topics, setting, visual mood, and direction prior to creating scenes. Determine the action of characters and objects from one moment to the next. The common continuity problems are character location, camera position, background, clothing changes, etc. Clear instructions for movement can minimize these problems. Identify starting points of subjects, actions, and end points. Avoid too much movement in the camera, light sources, and backgrounds unless they help the story. Connected scene logic is ideal for product reveals, social videos, cinematic shots, and brand campaigns.
Extend Successful Scenes for Stronger Visual Progression
Footage extension can be used to extend a scene that has already been set up in a way that sets the look, action, and mood. Rather than creating the idea from scratch, one could take existing footage that is known to work well. Seedance 2.5 offers two extension rounds for a successful sequence to further develop. This can be helpful in a product demonstration that requires more action, or a story that takes more time to come to a conclusion. Check each extension for subject consistency, direction of camera, environment, and product details. Make sure the progression is purposeful and added footage enhances the story instead of just adding moments.
Conclusion
The AI-generated videos are more coherent, natural, and purposeful thanks to connected scene logic. Continuous footage, timestamp prompt, reference-guided generation, and footage extension are all capabilities of Seedance 2.5 that make this workflow possible. The first step to good results is to plan carefully before generation. Set the sequence of actions, arrange the movement of the subject and the camera, maintain important visual information, and use references for consistency. Check each transition and re-create/lengthen scenes as needed. However, with the use of structured prompts and careful refinement, the individual AI-generated moments can be woven into a seamless visual journey that conveys a clear message from start to finish.